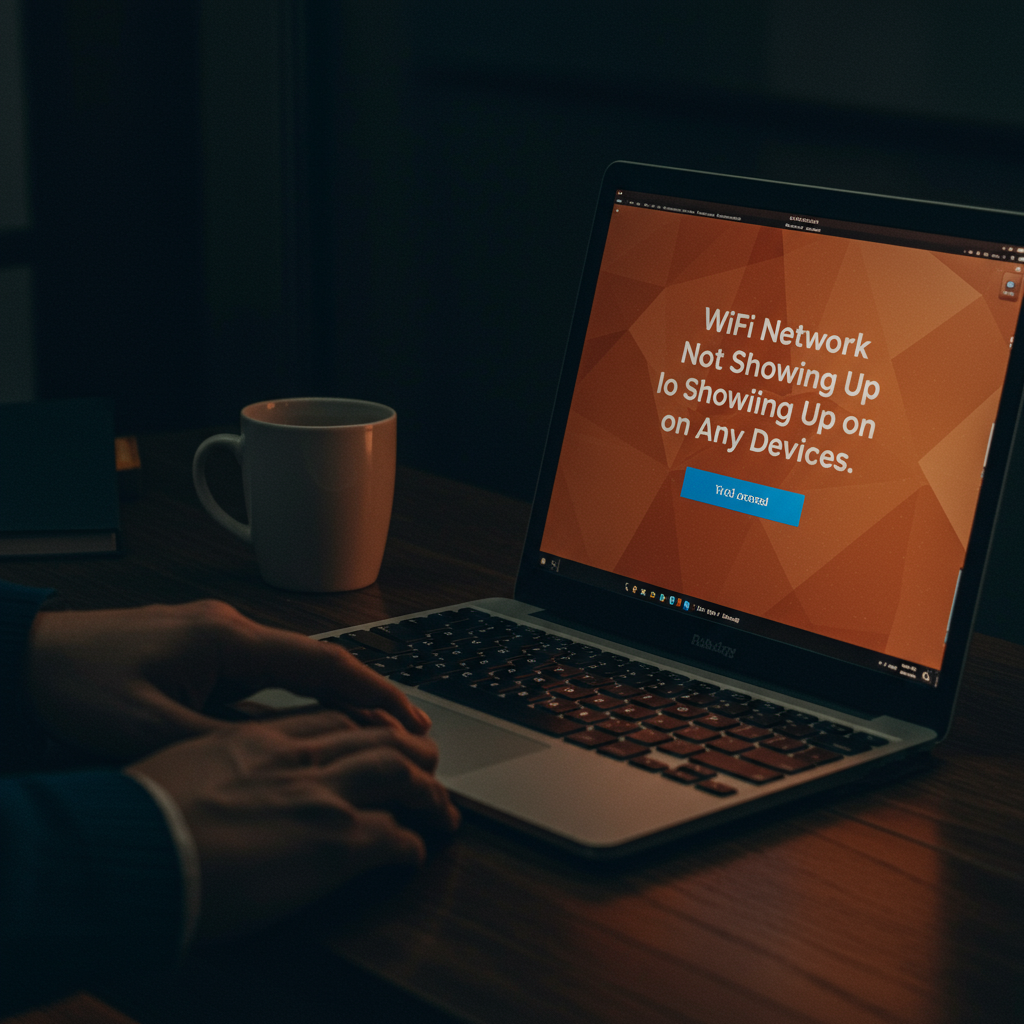
WiFi Network Not Showing Up on Any Devices? Here’s What to Do

You grab your phone, laptop, or tablet, eager to browse, stream, or catch up on emails, only to find your trusty home or office WiFi network is completely absent from the list of available connections. It’s not just weak signal; it’s gone. You refresh, you check other devices, and the same frustrating reality stares back: the familiar network name isn’t showing up anywhere. That immediate feeling of digital isolation sets in – you’re surrounded by devices, but effectively cut off from the online world you rely on.
This silent disappearance of your network can be incredibly puzzling and disruptive. Is it your device? Is it the router? Did something break? Before you panic or resign yourself to a disconnected existence, know that this is a common issue, and more often than not, it’s fixable with a systematic approach. This guide will walk you through the essential troubleshooting steps, from the simplest checks to slightly more involved solutions, to help you diagnose why your WiFi network is playing hide-and-seek and get it back in sight on all your devices.
Understanding Why Your WiFi Network Isn’t Appearing
The Fundamentals of WiFi Network Discovery
When your phone, laptop, or tablet searches for available WiFi networks, it’s essentially scanning the airwaves for signals transmitted by wireless routers or access points. These devices periodically send out special packets called “beacon frames”. These beacon frames contain crucial information about the network, including its name (SSID – Service Set Identifier), supported speeds, security type, and transmission channel.
Your device’s WiFi adapter acts like a receiver, listening for these beacon frames on various standard WiFi channels. Once it detects a beacon frame, it extracts the SSID and other details and displays the network name in the list of available networks. This process happens automatically and continuously as long as your device’s WiFi is enabled, allowing you to see all reachable networks within range that are broadcasting their presence.
Common Causes for a Missing WiFi Signal
Several issues can prevent your WiFi network from broadcasting its signal correctly. The most straightforward cause is often the router itself being powered off or malfunctioning. Without power or if there’s an internal fault, the router cannot send out those essential beacon frames that devices look for. A simple check of the router’s power lights and cables is always a good first step.
Another frequent reason is that the router is configured not to broadcast its SSID. This is a security setting that hides the network name from the standard list of available networks. While the network is still active, devices won’t see its name unless you manually enter the SSID. Less common but possible causes include firmware issues on the router, a conflict on the wireless channel it’s using due to interference from other devices, or a physical problem with the router’s wireless antenna or radio components.
What “Not Showing Up on Any Devices” Specifically Implies
When your WiFi network doesn’t appear on *any* device you try (phone, laptop, tablet, etc.), it strongly suggests the problem lies with the source of the signal – your router or access point – rather than the individual devices trying to connect. If only one device couldn’t see the network, you might suspect a problem with that specific device’s WiFi adapter or settings.
However, the collective failure of multiple devices to detect the network points to a failure in the network’s broadcast itself. This means the router is likely either not powered on, its wireless function is disabled, its SSID broadcast is turned off, or there is a significant hardware failure preventing it from transmitting the necessary beacon frames into the airwaves. It shifts the troubleshooting focus squarely onto the network equipment.
Initial Troubleshooting: Simple Checks on Your Devices
When your familiar WiFi network suddenly vanishes from the list of available connections on your phone, laptop, or tablet, the initial reaction might be panic. However, before delving into complex router settings or calling tech support, it’s crucial to start with the simplest checks right on the devices experiencing the problem. Often, the solution is a straightforward oversight or a temporary glitch that can be resolved quickly.
These initial troubleshooting steps focus on your individual devices to rule out common user errors or temporary software hiccups. By systematically going through these checks, you can quickly determine if the problem is specific to one device or if it points towards a larger issue with your network equipment. Let’s start by ensuring the fundamental settings on your device are configured correctly.
Ensure WiFi is Enabled on Your Device
This might sound incredibly basic, but it’s perhaps the most common reason a WiFi network doesn’t appear on a device. Most smartphones, tablets, and laptops have a dedicated setting to turn the WiFi adapter on or off. If this setting is inadvertently disabled, your device simply won’t scan for or detect any wireless networks, regardless of how many are broadcasting nearby.
Check the settings menu on your device. On Windows, look for the Network & Internet settings. On macOS, it’s in System Preferences under Network. For Android and iOS devices, you’ll find it in the main Settings app, usually near the top. Ensure the toggle switch or option for WiFi is flipped to the ‘On’ position. Sometimes, a recent software update or a hurried tap can accidentally disable this crucial function.
Check for Airplane Mode or Similar Settings
Airplane Mode is a setting designed to quickly disable all wireless communication on a device, including cellular, Bluetooth, and most importantly for this issue, WiFi. While its primary use is during air travel, it can be accidentally activated through quick settings panels or keyboard shortcuts on laptops. If Airplane Mode is on, your device cannot see or connect to any WiFi networks.
Beyond Airplane Mode, some devices or operating systems might have other modes or settings that temporarily disable wireless connectivity, perhaps as a battery-saving measure or part of a specific profile. Quickly access your device’s quick settings or notification panel (often by swiping down from the top of the screen on mobile devices, or checking the taskbar icons on computers) and ensure Airplane Mode is off. Also, look for any other modes that might restrict network access.
Perform a Simple Restart of All Affected Devices
It’s a classic IT solution for a reason: turning a device off and on again can resolve a surprising number of temporary software issues. Just like a computer can get bogged down or encounter a glitch, the WiFi adapter and network stack within your phone, tablet, or laptop can sometimes become unresponsive or stuck in a bad state, preventing them from properly scanning for networks.
A simple restart clears the device’s temporary memory (RAM) and reloads the operating system and drivers fresh. This process often resolves minor software conflicts or glitches that might be interfering with the WiFi functionality. Turn off the device completely (don’t just close the lid or lock the screen), wait 30 seconds, and then power it back on. Once it’s fully booted, check the WiFi settings again to see if your network now appears.
Verify Device Compatibility with Network Bands (2.4GHz vs 5GHz)
Modern WiFi routers often broadcast networks on two different frequency bands: 2.4GHz and 5GHz. The 2.4GHz band is older, offers greater range, and penetrates walls better, while the 5GHz band is faster but has a shorter range and is more easily obstructed. Some routers broadcast both bands under the same network name (SSID), while others use separate names (e.g., “MyNetwork” and “MyNetwork_5G”).
Older devices or certain budget models might only support the 2.4GHz band. If your router is configured to broadcast *only* a 5GHz network or uses separate SSIDs and your device only sees the 2.4GHz band, you won’t see the 5GHz network listed. Conversely, if your device primarily prefers 5GHz and your router’s 2.4GHz signal is weak or off, that could also be a factor. Check your device’s specifications or settings to see which bands it supports and ensure your router is broadcasting on a band your device can use.
Trying Multiple Devices to Isolate the Problem
If you’re experiencing the issue on one device, a crucial next step is to check if the WiFi network shows up on *other* devices in your home (smartphones, tablets, other laptops). This test helps you quickly determine whether the problem is specific to the first device you checked or if it’s a broader issue affecting multiple devices, potentially pointing towards your router or internet service.
If the WiFi network *does* appear and connect correctly on other devices, you know the problem is likely isolated to the initial device you were troubleshooting. This allows you to focus your efforts on fixing that specific phone, laptop, or tablet. However, if the network *doesn’t* appear on any other device you test, it strongly suggests the issue lies not with your individual devices, but with the WiFi network itself, meaning your router or modem needs attention.
Investigating Your Router and Modem Setup
Check the Power and Status Lights on Your Router and Modem
The first step in troubleshooting is always to visually inspect the devices involved. Your WiFi router and, if separate, your modem, have indicator lights that provide crucial information about their operational status. Locate these devices and observe the lights. You should see lights indicating power, internet connectivity (often labeled ‘Internet’ or ‘Online’), and WiFi activity (sometimes labeled ‘WLAN’, ‘Wireless’, or similar).
Ensure the power light is solid, indicating the device is receiving power. Look at the internet light; it should ideally be solid or blinking steadily, depending on your modem type, signifying a stable connection to your Internet Service Provider (ISP). For the router, check the WiFi or WLAN light. This light should also be on and potentially blinking to show network activity. If any critical lights like power, internet, or WiFi are off, blinking erratically (when they shouldn’t be), or displaying an error color (like red or orange, consult your manual), it indicates a potential hardware issue or a problem with your service connection.
How to Properly Power Cycle Your Router and Modem
Often, electronic devices can benefit from a simple restart, known as a power cycle. This clears temporary glitches and can resolve many connectivity issues, including a disappearing WiFi network. Do not just press a reset button (which can erase your settings); focus on simply turning the devices off and on again in the correct sequence.
Start by unplugging both your modem (if separate) and your router from their power outlets. Wait for at least 60 seconds. This allows the devices to fully discharge and reset their internal states. After the minute has passed, plug the modem back in first. Let it fully boot up and establish a connection to your ISP. This typically takes a few minutes, indicated by the internet or online light becoming solid or stable according to its normal state.
Once the modem is stable, plug your router back into its power outlet. Allow the router to fully boot up as well. This process also takes a few minutes, during which its lights will initialize. Once all the lights on both devices appear normal (power is on, internet is stable, WiFi is active), wait another minute or two before trying to search for your WiFi network on your devices.
Optimal Router Placement for Signal Visibility
The physical location of your router significantly impacts the strength and reach of your WiFi signal. Placing it incorrectly can result in dead zones, weak signals, or the signal not reaching certain areas, potentially making it appear non-existent on devices located far away or blocked by interference.
Ideally, your router should be placed in a central location in your home, elevated off the floor, and kept away from walls and obstructions as much as possible. Walls (especially thick or load-bearing ones), metal objects, large appliances (like microwaves, refrigerators), and even water (like fish tanks) can absorb or reflect WiFi signals, weakening them.
Avoid placing your router near other electronics that emit radio waves, such as cordless phones, Bluetooth devices, or microwaves, as these can cause interference on the same 2.4GHz frequency band used by many WiFi networks. A clear line of sight to where you typically use your devices is best for optimal signal strength and reliability, ensuring the network is visible and accessible.
Is the WiFi Network Visible or Connectable on *Any* Device?
When your WiFi network isn’t showing up, it’s important to determine if this is a problem with all your devices or just specific ones. Grab several different types of devices – a smartphone, a laptop, a tablet, etc. – and try scanning for WiFi networks near the router.
If the network is visible and connectable on *some* devices but not others, the issue is likely with the settings or hardware on the devices that cannot see it. Check the WiFi adapter on the problematic devices, ensure it’s enabled, and that the device drivers are updated. Also, verify that the device isn’t set to ignore or forget your specific network.
If the network is *not* visible on *any* device, even when standing right next to the router, this strongly suggests the problem lies with the router itself or the network configuration. This could be a router setting issue (like the WiFi being disabled or the SSID being hidden) or a hardware failure in the router’s wireless radio.
Understanding Router Boot-Up Sequence
When you power cycle or reboot your router, it goes through a specific boot-up sequence, which is critical for its proper operation and for broadcasting the WiFi signal. Knowing this sequence and allowing it to complete fully is essential before concluding there’s a problem.
Upon powering on, the router runs internal diagnostics, loads its operating system and configuration settings, initializes its hardware components (including the wireless radio), and attempts to establish connections. The indicator lights on the router typically reflect these stages – they might blink rapidly at first, then settle into a steady state as each stage completes.
It’s crucial to wait until the router’s lights indicate it has finished booting up and is operating normally (e.g., power light solid, WiFi light solid or blinking, internet light stable) before trying to connect or troubleshoot further. Interrupting this sequence or not allowing enough time can lead to the router failing to broadcast the network properly, resulting in your WiFi not showing up on devices. Be patient; the full boot-up process can take several minutes, especially for older or less powerful routers.
Deeper Dive: Router Configuration and Settings Issues
Accessing Your Router’s Administration Panel
To really get to the bottom of why your WiFi isn’t showing up, you need to look directly at the source of the problem: your router’s internal configuration. This is typically done by accessing its administration panel, which is a web-based interface you can reach through a web browser on a device connected to the router (usually via an Ethernet cable, or if another device *can* see the WiFi, using that connection). The first step is finding your router’s IP address, which is its gateway address. Common default IPs are 192.168.1.1, 192.168.0.1, or 192.168.1.254, but this can vary by manufacturer or if it was previously changed.
Once you have the IP address, open a web browser (like Chrome, Firefox, Safari, or Edge) and type the IP into the address bar. Press Enter, and you should be prompted for a username and password. These are the router’s login credentials, not your WiFi password. Default credentials are often printed on the router itself or found in its manual, but they should ideally have been changed for security. If you don’t know them and defaults don’t work, you might need to consult your ISP or consider a factory reset as a last resort (though this would erase all your settings).
After successfully logging in, you’ll enter the router’s dashboard or configuration page. The layout and options vary greatly depending on the router’s brand and model. Look for sections related to “Wireless Settings,” “WiFi,” “Network,” or “Advanced Settings.” This is where all the critical parameters for your WiFi network are controlled, and where you will investigate the following potential issues.
Confirming SSID Broadcast is Enabled (Un-Hiding Your Network)
One common reason a WiFi network doesn’t appear in the list of available networks on any device is that its SSID broadcast has been disabled. The SSID (Service Set Identifier) is simply the name of your WiFi network (e.g., “My Home Network”). By default, routers are configured to constantly broadcast this name, allowing devices to see and list it when scanning for networks.
If the SSID broadcast is turned off, your network becomes “hidden.” While this was sometimes perceived as a security measure in the past, it offers minimal protection against determined attackers and can cause significant inconvenience. Many devices, especially older ones, struggle to find and connect to hidden networks, and even when they can, it requires manually entering the exact SSID, which can be prone to typos.
Within your router’s administration panel, navigate to the wireless settings section. Look for an option labeled something like “SSID Broadcast,” “Broadcast Network Name,” “Hide SSID,” or “Enable SSID Broadcast.” Ensure this option is enabled or checked. If it’s disabled, enable it, save the changes, and restart your router. Once the router is back online, check if your WiFi network now appears in the list on your devices.
Verifying the Correct Network Name (SSID)
Even if the SSID broadcast is enabled, it’s crucial to verify that the name being broadcast is what you expect it to be, especially if the network name was changed at some point. Typos, unexpected characters, or even leading/trailing spaces in the network name stored on your devices can prevent them from correctly identifying and connecting to the network being broadcast by the router.
Log into your router’s administration panel and go to the wireless settings page. Locate the field that displays or allows you to set the network name (SSID). Note the exact spelling, capitalization, and any spaces in the SSID displayed here. This is the definitive name of your WiFi network as broadcast by the router.
Now, compare this exact name to what you are trying to find or connect to on your devices. If you are attempting a manual connection to a hidden network, ensure the SSID you are typing precisely matches what the router is broadcasting. If you are expecting it to appear in the list, make sure you are scanning for the correct name. Mismatched SSIDs, even by a single character, will result in your device not recognizing the network.
Checking for MAC Address Filtering That Might Be Blocking Devices
MAC address filtering is a security feature that allows a router to control which devices are permitted to connect to the network based on their unique hardware address (MAC address). While it can add a layer of security by only allowing known devices, if configured incorrectly or if you’ve added new devices, it can be the reason your devices can’t see or connect to the network.
Access your router’s administration panel and look for settings related to “MAC Filtering,” “Wireless Filtering,” or “Access Control.” This section will typically show a list of MAC addresses that are either allowed or blocked. There are usually two modes: “Allow list” (only devices on the list can connect) or “Deny list” (devices on the list are blocked, all others allowed).
If MAC filtering is enabled, check which mode is active. If it’s an “Allow list,” confirm that the MAC addresses of all the devices you want to connect are accurately listed. If it’s a “Deny list,” ensure that none of the MAC addresses of your devices are listed. If you find that filtering is enabled and potentially blocking your devices, you can try temporarily disabling the feature to see if the network appears. If it does, you’ll need to properly add or remove the relevant MAC addresses from the filter list.
Are You Broadcasting on Both 2.4GHz and 5GHz?
Most modern routers are dual-band, meaning they can broadcast WiFi signals on two different frequency bands: 2.4GHz and 5GHz. Some routers broadcast both bands with the same network name (SSID), while others create two separate network names (e.g., “MyHomeWiFi_2.4” and “MyHomeWiFi_5G”). Not all devices support both bands; older devices typically only support 2.4GHz, while newer devices support both.
If your router is configured to only broadcast on the 5GHz band, and you are using older devices that only support 2.4GHz, those devices will not be able to see your network at all. Conversely, while less common, if only the 2.4GHz band is active and you are specifically looking for a 5GHz network (perhaps because you manually disconnected from 2.4GHz), you won’t find it.
Log into your router settings and check the wireless configuration for both the 2.4GHz and 5GHz bands. Ensure that both bands are enabled if you need compatibility with a mix of older and newer devices, or if you expect to see separate network names for each band. Make sure the SSIDs for both bands are enabled for broadcast (not hidden) if that’s your preference. Adjusting these settings can ensure your network is discoverable by devices operating on either frequency.
Reviewing Channel Settings and Potential Congestion
Wireless networks operate on specific channels within the 2.4GHz and 5GHz bands. If your router’s channel overlaps with or is the same as a channel used by many neighboring WiFi networks (especially common in apartments or dense neighborhoods), interference can occur. Severe interference can sometimes make your network appear intermittently or not at all to devices, even if it’s broadcasting.
Routers are often set to select channels automatically, which usually works well. However, sometimes the “automatic” setting doesn’t choose the best channel in a congested environment, or it might get stuck on a problematic one. Manually selecting a less crowded channel can improve signal strength and stability, potentially making your network more reliably visible.
In your router’s wireless settings, look for an option called “Channel” or “Wireless Channel.” For the 2.4GHz band, channels 1, 6, and 11 are non-overlapping and generally recommended. For the 5GHz band, there are more non-overlapping channels. You can use WiFi analyzer apps on a smartphone or computer to see which channels are most used in your area. Once you identify a less congested channel, try manually setting your router to use it, save the changes, and restart. This simple adjustment can sometimes resolve visibility issues caused by environmental interference.
Addressing Device-Specific Network Adapter Problems (Especially Computers)

Sometimes the issue isn’t with the router itself, but with the device you’re using that can’t see the network. This is particularly common with computers, which rely on a dedicated network adapter to connect to WiFi. If your network appears on some devices but not others, or if *no* WiFi networks are showing up on a specific computer or phone, troubleshooting the device’s network hardware and software is crucial.
This section focuses on steps you can take on the device itself to diagnose and fix problems with its ability to detect and connect to wireless networks. We’ll cover checks from basic status verification to more advanced driver and configuration resets, helping you pinpoint why your specific device might be blind to your WiFi.
Checking the Status of Your WiFi Network Adapter
The most basic step is to ensure the device’s WiFi adapter is actually enabled and functioning correctly. Just like any other piece of hardware, it can sometimes be accidentally turned off, encounter a temporary glitch, or even develop a hardware fault. Checking its status confirms whether the operating system recognizes the adapter and if it’s currently active.
On Windows, you can typically find this information in the Device Manager. Look under “Network adapters” and locate your wireless adapter (it might have “Wireless,” “WiFi,” or the manufacturer’s name like Intel, Realtek, or Broadcom in its name). Ensure it doesn’t have a yellow exclamation mark (indicating a driver problem) or a red “X” (indicating it’s disabled). If disabled, right-click and select “Enable device.” On macOS, check the Network settings in System Preferences/Settings; the Wi-Fi status should be “On” and appear active. Mobile devices usually have a simple toggle in their settings menu.
If the adapter appears enabled but still shows errors or fails to list networks, try disabling and then re-enabling it within the operating system’s settings or Device Manager. This can sometimes resolve minor software hiccups affecting the adapter’s operation. If it consistently shows an error symbol, it points towards a driver issue or a potential hardware failure, which leads to the next steps.
Updating or Reinstalling Network Adapter Drivers
Drivers are essential software that allows your operating system to communicate with hardware components like your WiFi adapter. Outdated, corrupted, or incorrect drivers are a very common reason why a network adapter might not function properly, including failing to detect available WiFi networks. Ensuring you have the correct and most current driver installed is a critical troubleshooting step, especially after operating system updates or if the device is several years old.
For Windows users, the easiest way to start is via Device Manager. Right-click on your wireless adapter, select “Update driver,” and choose “Search automatically for drivers.” If Windows finds a newer driver online, install it. If that doesn’t work or Windows reports you have the best driver, it’s often more effective to download the latest driver directly from the adapter manufacturer’s website (e.g., Intel, Realtek, TP-Link) or the computer manufacturer’s support page (e.g., Dell, HP, Lenovo, Apple). You’ll need the exact model number of your adapter or computer.
Once you have the potentially newer driver downloaded, you can often install it by running an executable file. Alternatively, in Device Manager, you can right-click the adapter, select “Uninstall device” (checking the box to “Delete the driver software for this device” if available and you have a replacement driver ready), then restart your computer. Upon restart, Windows will usually try to reinstall a generic driver, or you can then manually install the driver you downloaded. This clean reinstallation process can fix issues caused by driver corruption.
Running Built-in Operating System Network Troubleshooters
Most modern operating systems include built-in troubleshooting tools designed to automatically detect and attempt to fix common network problems. These tools can often identify issues like disabled adapters, driver problems, or conflicts in network configuration settings without requiring manual intervention. Running these troubleshooters can be a quick and effective first step when your device isn’t seeing networks.
On Windows, you can access the Network Troubleshooter by right-clicking the network icon in the system tray and selecting “Troubleshoot problems,” or by going to Settings > Network & Internet > Status and clicking “Network troubleshooter.” This tool will scan for issues with your network adapters and connections and often suggest or automatically apply fixes. It might, for instance, detect that your WiFi adapter is turned off or that a necessary network service isn’t running.
While macOS doesn’t have a single, overarching “Network Troubleshooter” in the same way Windows does, its Network Utility (found via Spotlight search or within System/Utilities) and the diagnostic tools accessible via the WiFi status menu (Option-Click the WiFi icon) can help. These tools can assist in checking connection status, running diagnostics, and providing information that might point to a problem with the adapter or configuration, guiding you toward a solution.
Performing a Network Settings Reset on Your Device
Accumulated network configurations, custom settings, VPN client installations, or even malware can sometimes corrupt the network stack on a device, leading to connectivity issues or the inability to detect networks. Performing a network settings reset essentially wipes all network-related configurations back to their default state. This is a more drastic step than simply restarting the adapter or running a troubleshooter, but it can resolve stubborn problems caused by configuration conflicts.
A network reset will typically uninstall and reinstall your network adapters, reset your IP settings (like DNS servers), clear the Windows Sockets API (Winsock) catalog, and reset network services. Be aware that after performing a network reset, you will need to re-enter the passwords for all your saved WiFi networks and potentially reconfigure any VPN clients or specific network settings you had previously set up.
On Windows 10 and 11, you can find this option under Settings > Network & Internet > Advanced network settings > Network reset. Click “Reset now” and confirm. Your computer will likely restart. On macOS, while there isn’t a single “Network Reset” button in the same vein, deleting and re-adding your WiFi interface in Network Preferences or using command-line tools can achieve a similar effect of resetting the configuration for that adapter. This step should be considered if other methods haven’t resolved the issue.
Ensuring Your Adapter Supports the Router’s WiFi Standards (e.g., Wi-Fi 6)
Not all WiFi adapters are created equal, and they support different wireless standards (like 802.11n, 802.11ac/Wi-Fi 5, 802.11ax/Wi-Fi 6, etc.) and frequency bands (2.4 GHz, 5 GHz, 6 GHz). If your router is configured to broadcast its network exclusively using a standard or frequency band that your device’s adapter does not support, the network will simply not show up in the list of available networks on that device, even if the router is working perfectly and other devices connect fine.
For example, if you have a brand new Wi-Fi 6E router broadcasting a network only on the 6 GHz band, and your laptop only has an older Wi-Fi 5 adapter that only supports 2.4 GHz and 5 GHz, the laptop will never see that 6 GHz network. Similarly, some routers can be configured to prioritize or only use newer standards, which might make them invisible to very old devices unless backward compatibility is explicitly enabled or the network is also broadcast on an older standard or band.
Check the specifications of your device’s WiFi adapter (often found in Device Manager on Windows, or by looking up the device’s model number online) and compare them to the capabilities and current configuration of your router. Most modern routers broadcast on both 2.4 GHz (for older devices and longer range) and 5 GHz (for faster speeds). Ensure your router is broadcasting on a frequency band and standard your adapter supports. You might need to log into your router’s settings to verify or adjust its wireless mode and band settings, potentially enabling mixed modes or separate SSIDs for different bands to ensure compatibility with all your devices.
External Interference and Advanced Troubleshooting Steps
Identifying Potential Sources of Wireless Interference
Your WiFi network signal can be significantly impacted by interference from other electronic devices operating on similar radio frequencies. Common culprits include microwaves, cordless phones (especially older 2.4GHz models), Bluetooth devices, wireless cameras, and even fluorescent lights. These devices emit signals that can clutter the airwaves, making it difficult for your router to broadcast its signal clearly and for your devices to detect it reliably. When your network is not showing up, this interference could be strong enough to effectively “jam” or mask your WiFi signal in certain areas.
Furthermore, interference can come from neighboring WiFi networks, particularly in crowded residential areas or office buildings. Most routers operate on the 2.4GHz or 5GHz bands, and within these bands, they use specific channels. If many networks nearby are using the same or overlapping channels, it creates congestion. While this usually results in slow speeds or dropped connections, severe channel congestion or strong signals from nearby sources can potentially make your network harder for devices to see, especially if your router’s signal is weak or your device’s receiver is struggling. Consider relocating your router away from potential sources of interference and, if possible, exploring router settings to change the WiFi channel.
Checking for and Installing Router Firmware Updates
Router manufacturers periodically release firmware updates to improve performance, fix bugs, patch security vulnerabilities, and sometimes enhance compatibility. Outdated firmware can lead to various issues, including instability, poor signal strength, or problems with broadcasting the network name (SSID) consistently. If your router hasn’t been updated in a long time, this could potentially be contributing to the network not showing up.
To check for and install firmware updates, you typically need to access your router’s web interface. Open a web browser, type in your router’s IP address (commonly 192.168.1.1 or 192.168.0.1), and log in using your administrator credentials. Look for a section related to “Administration,” “System,” “Maintenance,” or “Firmware Update.” The interface should show you the current firmware version and offer an option to check for updates online or upload a new firmware file downloaded from the manufacturer’s website. Follow the on-screen instructions carefully and ensure the router is not powered off during the update process, as this can damage the device.
Ruling Out Hardware Failure of the Router or Network Adapter
Sometimes, the issue isn’t interference or settings but a physical problem with the equipment itself. Your router might be experiencing hardware failure, either completely or specifically with its wireless components. Check the router’s indicator lights; most routers have a light that indicates the WiFi signal is active (often labeled WLAN or Wireless). If this light is off, blinking erratically, or a different color than usual, it could signal a hardware problem with the wireless broadcasting capability. Ensure the router is receiving power and try unplugging it, waiting 30 seconds, and plugging it back in for a hard reboot.
Similarly, the network adapter in your device (laptop, phone, tablet) could be the point of failure. If your WiFi network shows up on other devices but not a specific one, the problem likely lies with that device’s network adapter or its software/drivers. Check the device’s settings to ensure WiFi is enabled and not in airplane mode. On a computer, you can check the Device Manager (Windows) or System Information (macOS) to see if the network adapter is recognized and functioning correctly. Try disabling and re-enabling the adapter, or updating its drivers, to rule out software glitches or driver issues before concluding it’s a hardware fault.
Is There an Internet Service Provider (ISP) Outage in Your Area?
While your WiFi network originates from your router, issues with your internet service provider (ISP) can sometimes affect how your router behaves or initializes, potentially preventing it from broadcasting correctly. If there’s a widespread outage in your area, your modem might not be able to establish a connection, and subsequently, the router might not fully boot up or enable all its functions, including the wireless broadcast, as it detects a lack of upstream connectivity.
It’s a good idea to check if your ISP is experiencing technical difficulties or planned maintenance. You can typically find this information on your ISP’s official website, their social media channels (like Twitter or Facebook), or by contacting their customer support line. Some ISPs also have status pages where you can enter your address to see if there are reported issues in your specific location. If there is a confirmed outage, you may simply need to wait until the service is restored by the ISP, after which your network should reappear.
Testing with a Different Router or Network
To definitively isolate whether the problem lies with your router or your device(s), testing with alternative hardware is a crucial step. First, if your router has Ethernet ports, try connecting a computer directly to the router using an Ethernet cable. If you can access the internet this way, it confirms that the router’s wired functions are working and that the issue is specifically with its wireless capabilities or broadcasting.
Next, try connecting your problematic device (laptop, phone) to a different, known-working WiFi network. This could be a mobile hotspot created from another phone, a neighbor’s network (with permission), or a public WiFi network. If your device can connect to other WiFi networks without issue, it strongly suggests the problem is with your router or its specific configuration, rather than the device’s WiFi adapter itself. Conversely, if the device fails to connect to any WiFi network, the issue is likely with the device’s hardware or software. If possible, test your original router with a different device that you know has a working WiFi adapter; if that device also cannot see your network, it points squarely to the router as the source of the problem.
Troubleshooting Specific WiFi Network Scenarios

My Network Isn’t Showing Up After a New Router Setup
Setting up a new router is exciting, but sometimes the new network simply doesn’t appear in your device’s WiFi list. The most common culprit is often an incomplete or incorrect setup process. Ensure you’ve followed the manufacturer’s instructions precisely, including connecting the modem correctly and powering on devices in the right order. Sometimes, the router hasn’t fully booted up, or its internal configuration hasn’t been saved properly, preventing it from broadcasting its network name (SSID).
Another frequent issue is that the router might be broadcasting on a band (like 5GHz) that your older device doesn’t support, or band steering is enabled, making the network appear under a different name or not show up consistently. Check the router’s administration interface (usually accessed via a web browser) to confirm the wireless settings. Verify that the wireless radio is enabled, the SSID Broadcast option is turned on, and note the exact network name and security type. It’s also worth trying a different device to see if the network appears, which could indicate a device-specific compatibility problem rather than a router issue.
What to Do If the Network Disappeared After Changing Router Settings
If your network was working fine and then vanished after you made changes to the router’s settings, the changes themselves are the prime suspect. First, try to remember exactly what you altered. Did you change the SSID (network name), the security type (WPA2 to WPA3), the password, or perhaps disable a specific WiFi band (2.4GHz or 5GHz)? One common mistake is accidentally disabling the wireless radio entirely or changing the SSID to something you don’t recognize or can’t remember.
Access the router’s web interface again using a wired connection if necessary. Navigate back to the wireless settings section. Verify that the WiFi is enabled for all desired bands and that the SSID Broadcast feature is still active. Double-check the SSID name for any typos or unexpected characters. If you changed the security type or password, ensure your devices are attempting to connect with the new credentials. If you can’t pinpoint the exact change that caused the problem, or if you are locked out of the interface, performing a factory reset on the router is often the quickest way to restore the network to its default working state, although this means you’ll lose any custom configurations.
Issues with Mesh WiFi Systems and Satellite Units Not Broadcasting
Mesh WiFi systems rely on satellite units or nodes communicating with a main router to extend coverage. If your network isn’t showing up, particularly in areas where a satellite unit should be providing coverage, that specific node might be the problem. The satellite unit could be offline, out of range of the main router or another node, or experiencing a pairing issue that prevents it from joining the mesh network and broadcasting the SSID.
Ensure the satellite unit is powered on and its indicator lights are showing the correct status (refer to your system’s manual – lights often indicate connection strength or errors). Try moving the satellite closer to the main router or another functional node to rule out range issues. Sometimes, simply restarting the satellite unit, and then the main router, can resolve temporary glitches. If the issue persists, you might need to re-add or re-pair the satellite unit to the mesh system through the system’s mobile app or web interface, confirming that the main router itself is online and broadcasting the network correctly.
Troubleshooting Connection Problems with Guest Networks
Guest networks provide separate access for visitors, but they can sometimes be invisible or difficult to connect to. A primary reason for this is often that the guest network feature is disabled in the router settings. Unlike the main network, the guest network is typically an optional feature that needs to be explicitly turned on during configuration.
Furthermore, guest networks often have specific isolation settings that prevent guest devices from seeing each other or accessing the main network resources. While this enhances security, it can sometimes interfere with certain device types or connection protocols. Check the guest network settings in your router’s administration panel to ensure it’s enabled, has an SSID broadcast turned on, and verify any security settings or captive portal requirements that might need manual interaction (like agreeing to terms) after connecting. Ensure your device isn’t blocked by any MAC filtering rules that might have been inadvertently applied to the guest network.
Why Public WiFi Hotspots Might Not Be Visible
Trying to find a public WiFi hotspot in a café, airport, or hotel, only to find it’s not listed on your device, can be frustrating. Several factors could be at play. You might simply be too far from the hotspot’s broadcast range; public WiFi antennas often have limited power or are obstructed by walls and furniture. Your device’s WiFi receiver sensitivity also plays a role.
Another reason could be that the hotspot requires a specific action to become visible or accessible, such as connecting to an unsecure, hidden network name first before being redirected to a login page (a captive portal). Some public networks are also configured to only broadcast intermittently or might be experiencing technical issues. Lastly, ensure your device’s WiFi is enabled and working correctly and that it hasn’t been configured to ignore unsecured networks or networks with hidden SSIDs, as some public hotspots might fit these criteria.
When to Seek Professional Assistance
You’ve gone through the initial troubleshooting steps – restarting your router and modem, checking cables, verifying device WiFi settings, and perhaps even trying different devices. If your WiFi network is still stubbornly refusing to appear on any of your devices after these basic attempts, it’s a strong indicator that the problem might be more complex or require professional intervention. Don’t feel discouraged; sometimes, the issue lies beyond simple user fixes.
Knowing when to escalate the problem to the appropriate technical support is crucial for getting your network back online efficiently. While DIY troubleshooting is often the first line of defense, recognize when you’ve exhausted your options and need expert help. This section will guide you through the various professional resources available and help you decide which avenue is best suited for your specific situation.
Contacting Your Internet Service Provider (ISP) for Support
Your Internet Service Provider (ISP) is the company that delivers the internet connection to your home. While they primarily manage the connection up to your modem, they can still be a vital resource when your WiFi network isn’t showing up, especially if the issue might stem from their equipment or the service itself. It’s wise to contact them if you suspect the problem lies with the internet line coming into your home or the modem they provided.
Before calling your ISP, ensure you’ve checked their website or social media for known service outages in your area. If there’s a widespread issue, they are likely already aware and working on it. When you contact them, explain the steps you’ve already taken (like restarting equipment) and describe the specific problem – that your *WiFi network name (SSID) does not appear* in the list of available networks on any device. They can remotely check the status of your modem and the connection to your home, potentially identifying issues like a line fault, a problem with your service configuration, or a malfunctioning ISP-provided modem.
Reaching Out to the Router Manufacturer’s Technical Support
If you own your router, as opposed to renting one from your ISP, the router manufacturer’s technical support line can be invaluable. They are experts on the specific hardware and software running on your device. If you’ve confirmed that the internet signal is reaching your modem successfully (sometimes indicated by specific lights on the modem), but your separate router isn’t broadcasting the WiFi signal, the issue is likely with the router itself.
Contact the router manufacturer’s support if basic reboots haven’t worked and you suspect a hardware defect, a complex firmware issue, or a setting you might have inadvertently changed that’s preventing the WiFi broadcast. They can guide you through more advanced troubleshooting steps specific to your router model, such as performing a factory reset (which erases all custom settings but can resolve software glitches) or diagnosing potential hardware failures based on the router’s indicator lights and behavior. Have your router model and serial number ready when you call.
Considering Help from a Local IT Professional
For situations where the problem is complex, you have a non-standard network setup, or you’re simply not comfortable troubleshooting technical issues yourself, bringing in a local IT professional or computer technician can be the most effective solution. They can provide on-site assistance, which is particularly helpful for diagnosing issues related to the physical environment, such as signal interference, or problems interacting between different pieces of equipment in your home network.
A local IT expert can assess your entire network setup, including the placement of equipment, potential sources of interference (like microwaves, cordless phones, or neighboring networks), and configurations on multiple devices. They have the tools and expertise to thoroughly diagnose whether the issue is with the modem, the router, device settings, or environmental factors. This is a good option if you’ve exhausted ISP and manufacturer support without success, or if the problem is intermittent or affects only certain areas of your home.
Deciding When It’s Time to Replace Equipment
Sometimes, despite all troubleshooting efforts and professional consultations, the conclusion might be that your network equipment, specifically the router or modem, is failing or outdated. Technology has a lifespan, and networking gear is no exception. Constant connectivity demands, firmware updates, and physical wear and tear can eventually lead to hardware degradation.
Consider replacing your router or modem if the equipment is several years old (5+ years is often considered aging for routers), if it frequently drops connection or exhibits erratic behavior, or if a professional diagnosis points to internal hardware failure. Outdated equipment may also struggle to support modern internet speeds and devices, even if it is technically still functioning. Replacing faulty or old gear can often resolve persistent “WiFi not showing up” issues and improve overall network performance and reliability.
Preventing Your WiFi Network from Disappearing Again
Regular Router Maintenance and Checking for Updates
Just like any electronic device, your router benefits significantly from routine care. This isn’t just about dusting it off, but actively managing its software and performance. Periodically restarting your router, perhaps once a month or even weekly, can clear temporary glitches, refresh network connections, and resolve minor software conflicts that might accumulate over time and potentially affect network stability and visibility. This simple action can prevent many common issues before they occur.
More critically, keeping your router’s firmware updated is essential. Firmware is the operating system of your router, and manufacturers frequently release updates to fix bugs, improve security, enhance performance, and add new features. Outdated firmware can lead to instability, security vulnerabilities, and communication errors that might cause your network to become invisible or unreliable to devices. Regularly checking your router’s administration panel for available updates and installing them promptly is a vital preventative measure.
Keeping Network Adapter Drivers Current
While your router broadcasts the signal, your devices need working network adapters and drivers to receive and connect to it. Network adapter drivers are software programs that allow your device’s operating system (like Windows, macOS, or a mobile OS) to communicate properly with the physical WiFi hardware inside your computer, phone, or tablet. If these drivers are outdated, corrupted, or incompatible, the device may struggle to detect or connect to WiFi networks, even if the network is broadcasting perfectly.
Ensuring that the network adapter drivers on all your devices are current is crucial for reliable connectivity. For computers, you can typically find driver updates through the operating system’s update utility, the device manufacturer’s website (e.g., Dell, HP, Lenovo), or the network adapter chip manufacturer’s website (e.g., Intel, Realtek, Broadcom). Mobile devices usually receive driver updates as part of system software updates. Regularly checking for and installing these updates helps maintain compatibility and performance, reducing the likelihood of your device failing to see available networks.
Documenting Your Router’s Configuration Settings
One of the most frustrating aspects of a disappearing network is having to set everything up again from scratch, especially if you don’t remember the exact settings. Taking the time to document your router’s key configuration settings can be a lifesaver in such situations and aids in quicker troubleshooting and recovery. Important details to record include your Network Name (SSID), WiFi password, the type of security used (WPA2, WPA3), the operating mode (e.g., 802.11ac, 802.11ax), and critical network settings like the IP address range and DNS servers.
Beyond basic connection details, also note down any custom configurations you’ve made, such as static IP assignments, port forwarding rules, MAC address filtering lists, or specific channel selections for 2.4 GHz and 5 GHz bands. Keeping this information stored securely – perhaps in a password manager, a physical notebook stored safely, or a secured digital document – ensures that if your router resets or needs reconfiguration, you have all the necessary details readily available to restore your network quickly and accurately, preventing extended downtime and confusion.
Choosing Quality and Reliable Network Hardware
The reliability of your WiFi network is fundamentally tied to the quality of the hardware you use. Budget-friendly routers or older models might seem appealing but can often suffer from less stable performance, weaker signal strength, limited processing power, and less frequent software updates compared to more reputable brands and current-generation devices. These limitations can contribute to intermittent connectivity issues, unexpected drops, and the network occasionally becoming undetectable to devices, especially in environments with many connected devices or significant wireless interference.
Investing in a quality router from a known and respected manufacturer is a significant preventative step. Look for routers that meet current WiFi standards (like WiFi 6 or WiFi 6E for future-proofing), have positive reviews regarding stability and range, and offer robust firmware support with regular updates. Similarly, ensure the network adapters in your devices are not outdated or low-quality. Reliable hardware is built with better components and design, leading to more consistent performance and a significantly lower chance of experiencing frustrating issues like your WiFi network vanishing without warning.
Conclusion: Regaining Visibility of Your WiFi Network
After navigating through various potential culprits, from simple restarts to delving into router configurations, the goal remains the same: to make your WiFi network visible and accessible to all your devices once more. Troubleshooting network issues can sometimes feel like detective work, requiring patience and a systematic approach. By methodically checking each possibility, you significantly increase your chances of uncovering the root cause behind your vanishing WiFi signal.
Summary of Key Troubleshooting Steps
Our journey began with the most basic yet often effective steps: restarting your router, modem, and the devices attempting to connect. This clears temporary glitches and allows the equipment to re-establish connections. We then moved to verifying that WiFi is indeed enabled on your devices and that the network adapter is functioning correctly, ruling out issues specific to the client device itself rather than the network source.
Further investigation involved checking the router’s status lights and accessing its administrative interface to ensure the wireless network is broadcasting (SSID broadcast enabled) and configured correctly. We also considered environmental factors like interference from other devices or networks operating on overlapping channels, which can sometimes make a signal appear weak or even invisible to some devices. Updating router firmware was another crucial step discussed, as outdated software can lead to various performance and visibility issues.
Final Checklist to Resolve the Issue
Before concluding that the problem requires external assistance, run through a final verification checklist. Confirm that your router is powered on and all relevant indicator lights (power, internet, wireless) are illuminated and stable, not blinking erratically. Ensure that the SSID (network name) configured in your router’s settings is exactly what you expect and haven’t accidentally changed it or hidden it without realizing.
Double-check that your device’s WiFi is turned on and that airplane mode is deactivated. Try connecting another device (like a smartphone or laptop) to the network if possible; if other devices *can* see and connect to the WiFi, the problem is likely isolated to the original device you were troubleshooting. Verify you haven’t accidentally added MAC address filtering on your router that might be blocking your device.
What to Do If the Problem Persists
If you have meticulously followed the troubleshooting steps outlined and your WiFi network still refuses to appear on any device, it’s time to consider escalating the issue. Your Internet Service Provider (ISP) is a valuable resource at this stage. They can check for service outages in your area, verify the modem and router’s connection to their network, and potentially offer remote diagnostic assistance specific to your equipment model.
Alternatively, if you own your router, contacting the router manufacturer’s support can be helpful. They can provide model-specific troubleshooting, guide you through advanced settings, or help determine if the router itself is faulty. A persistent issue affecting all devices might indicate a hardware failure in the router’s wireless components, or a problem with the modem/ISP connection preventing the router from broadcasting correctly. In such cases, replacing the hardware or seeking professional IT support might be the necessary next step.